Remember the chaos of WebDev_Project_Final_v2? If that touched a nerve, you’re ready for the solution.
Welcome to Git. If you are learning to code, this tool is as essential as your keyboard. It’s the industry standard for saving your work, fixing your mistakes, and collaborating without losing your mind.
What is Git?
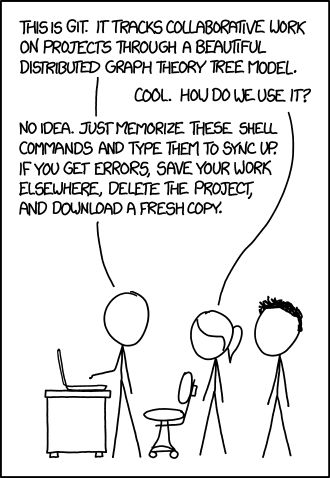
At its core, Git is a Distributed Version Control System.
I agree that it sounds like a mouthful of tech jargon, so let’s break it down:
“Version Control" means it manages changes to your files over time.
"Distributed” means that when you work on a project, you don't just have one file; you have the entire history of that project saved right on your machine.
Think of Git as a super-powered "Save" button. Git takes a snapshot of your entire project at that specific moment. It keeps the old version safe and sound, just in case you need to go back.
Why Git is Used
Why do developers rely so heavily on this tool? It solves the "Pendrive Problem".
Speed: Since operations are performed locally on your computer, it’s lightning fast.
Safety: Every developer has a full backup of the code. If the main server crashes, any teammate’s computer can restore the project.
Freedom to Experiment: You can try out crazy new ideas without breaking the main code (we’ll get to "branching" in a second).
Git Basics and Core Terminologies
Before you start typing commands, you need to speak the language. Here are the four concepts you will use every single day:
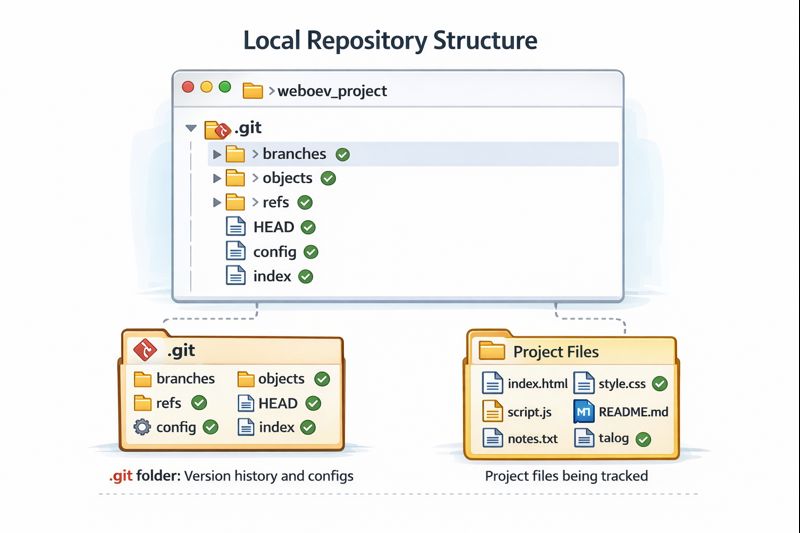
Repository (Repo): This is just a fancy name for your project folder. It contains all your project files and the history of every change made to them.
Commit: A commit is a snapshot. When you "commit" code, you are saving a version of your project at that point in time. It’s like a checkpoint in a video game—if you die (or break the code), you respawn here.
Branch: Imagine a parallel universe. You can create a "branch" to work on a new feature. Changes here don't affect the main project until you decide to merge them back in.
Head: This is a pointer that says, "You are here." It points to the latest commit on the branch you are currently looking at.
Common Git Commands
Let’s walk through a real-world scenario. Start a new project in any code editor (like VSCode). Then open your terminal, and let's get to work.
Starting a Project:
First, navigate to your folder and tell Git to start watching it.
git init
Congratulations, you just created a repository.
Checking Your Status:
Create a file called
index.html. You want to see if Git noticed it.
git status
Git will list index.html under "Untracked files" (often in red text). This means Git sees the file, but isn't saving it yet.
Staging Your Files:
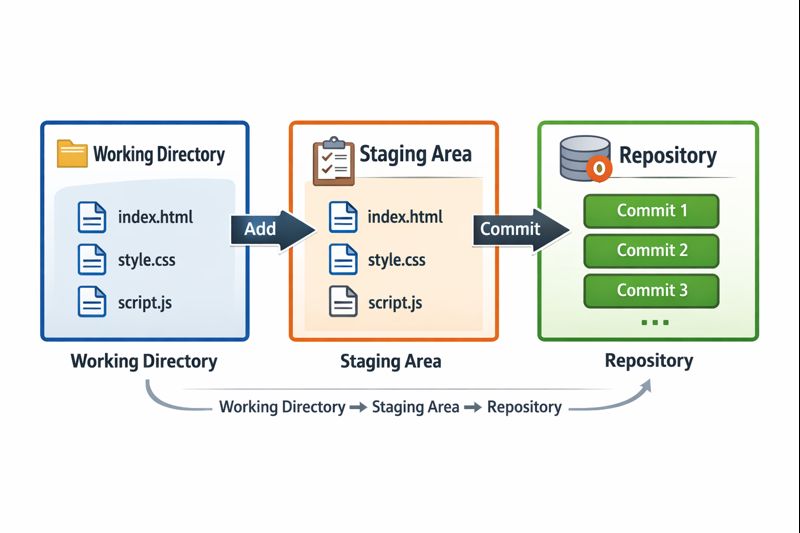
Before you save, you have to tell Git what to save. This is called "staging." Think of it like putting items in a box before you tape it shut.
git add index.html
Or, to add everything in the folder:
git add .
Saving the Snapshot:
Now that your files are in the box (staged), you seal it with a label. This label is your commit command. It is good practice to include the message flag (
-m) with it and make the commit descriptive.
git commit -m "Description of the commit"
Viewing History:
Want to see a list of everything you’ve done so far?
git log
This shows you a list of commits, the author, the date, and that unique "hash" (a long string of numbers and letters) for each commit.
Handling Mistakes:
This is where Git shines. Let's say you made some changes to
index.htmlbut haven't committed them yet. To see exactly what lines changed between your file and the last commit, type:
git diff
- Undo specific changes:
If you already committed a mistake, you can create a new commit that is the exact opposite of the bad one, effectively canceling it out without erasing history.
git revert <commit hash>
The Nuclear Option:
[Warning!] This is dangerous. If you want to completely destroy recent changes and force your code back to an old state (erasing everything that happened after):
git reset --hard <commit hash>
Working in Parallel:
You want to add a feature, but you're worried you might break the homepage. Create a new branch:
git branch feature_name
Then, you must switch to that branch to start using it:
git checkout feature_name
Now you can switch to this branch and code safely. If the feature has any bug, you can just delete the branch, and your homepage remains perfect.